
NopServices Lazy Load Plugin V 3.2
Ιnstallation – configuration of lazy load plugin for NopCommerce 3.2
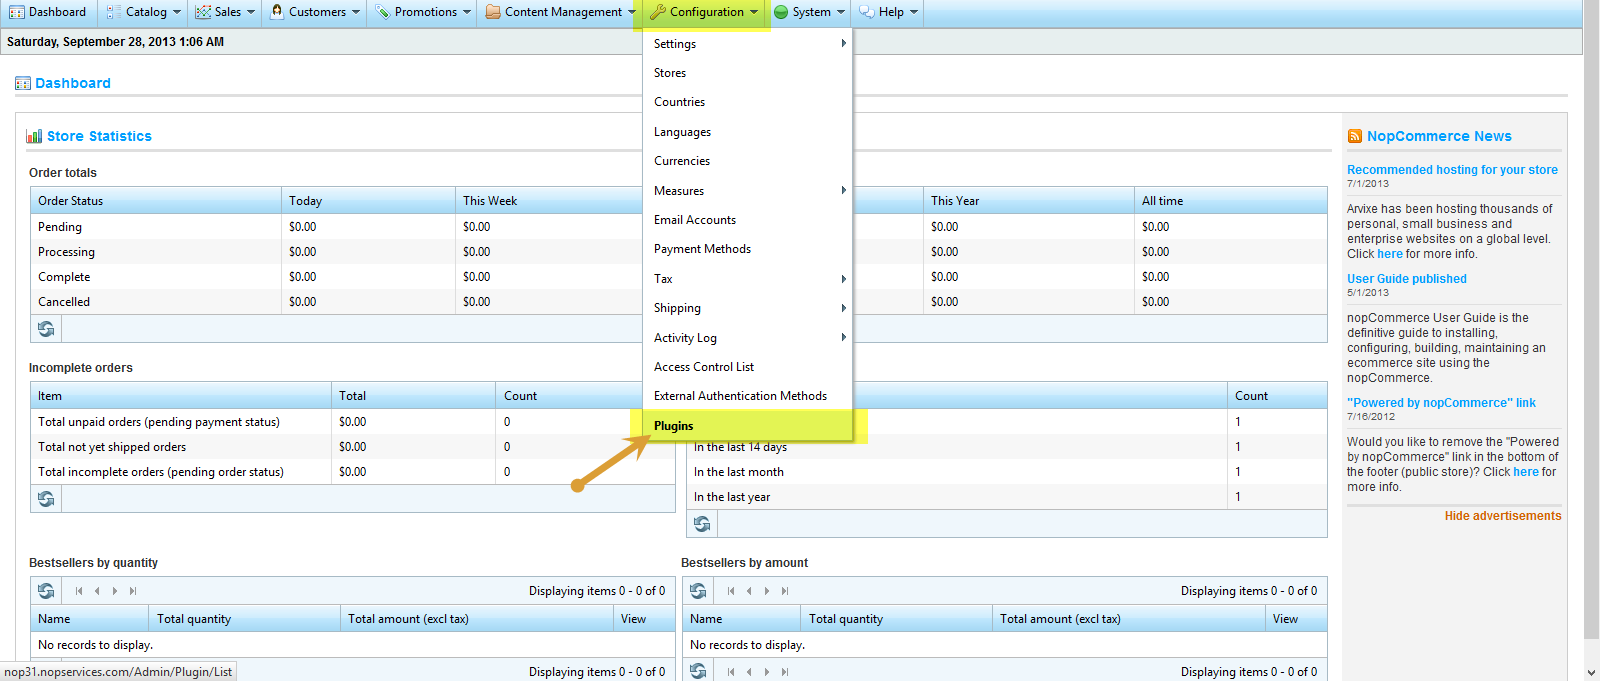
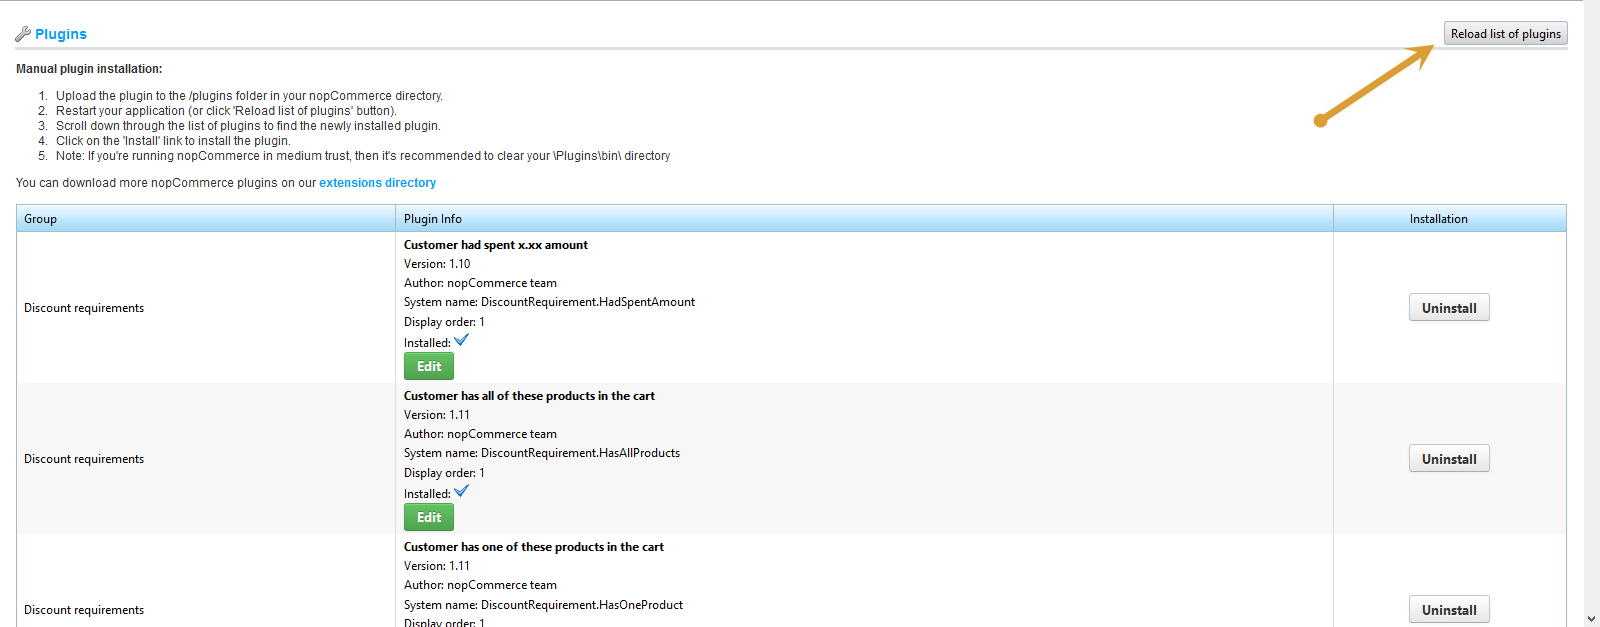
4. Then click on the “Reload list of plugins” button. Have a look at the picture below
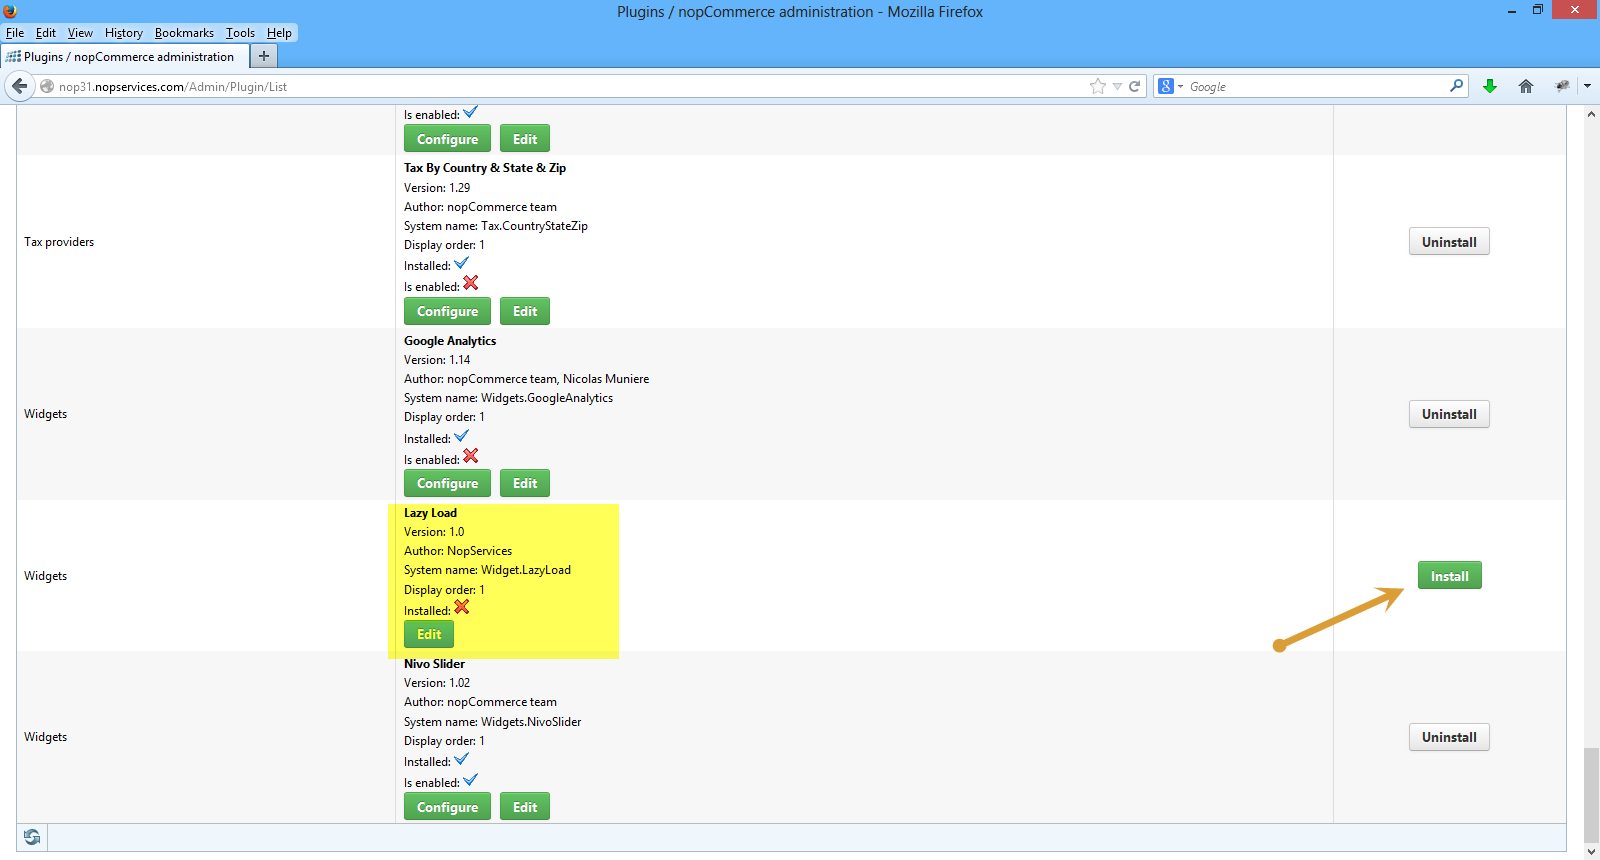
5. Scroll down until you see the Lazy Load widget and click the Install button. The plugin will be successfully installed.
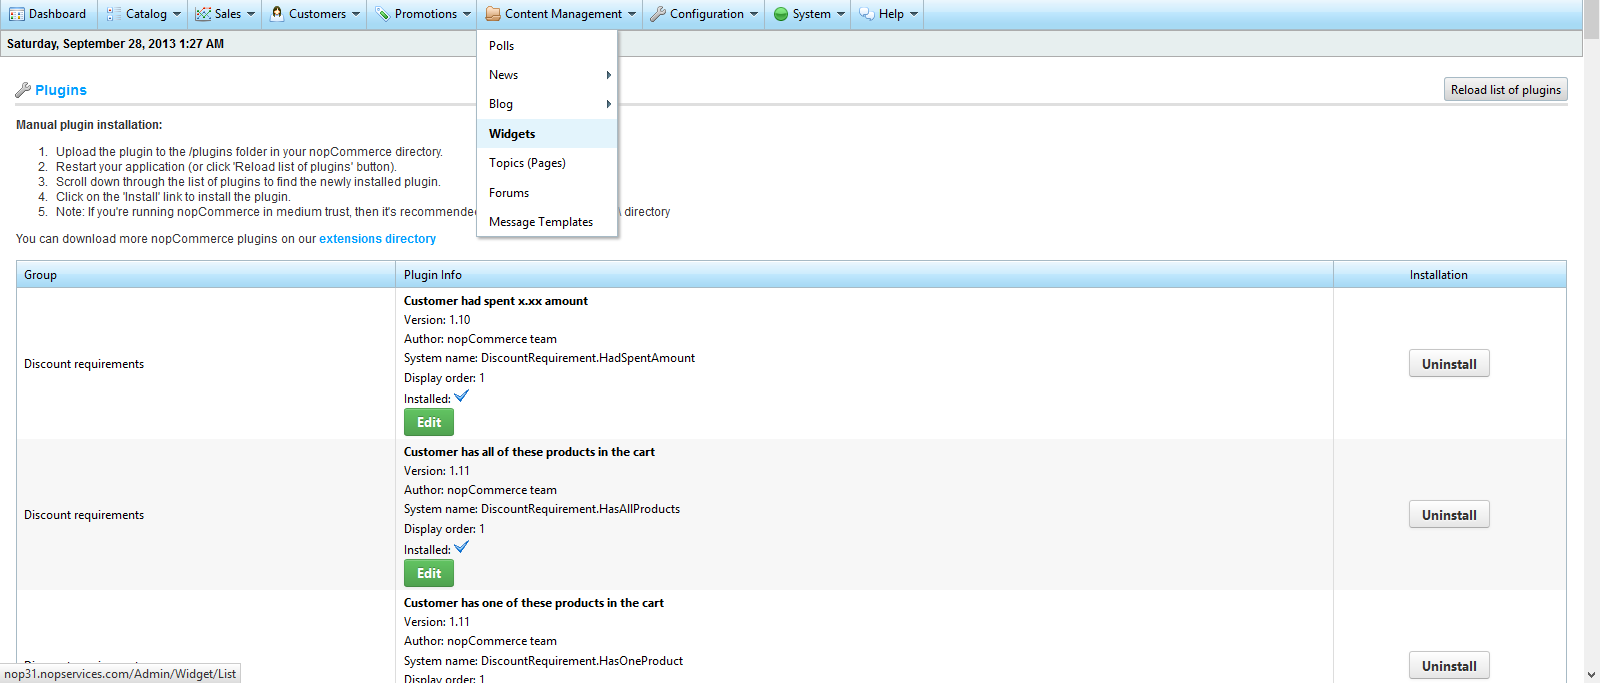
6. Then go to Content Management ->Widgets
7. Then click edit and activate the plugin.
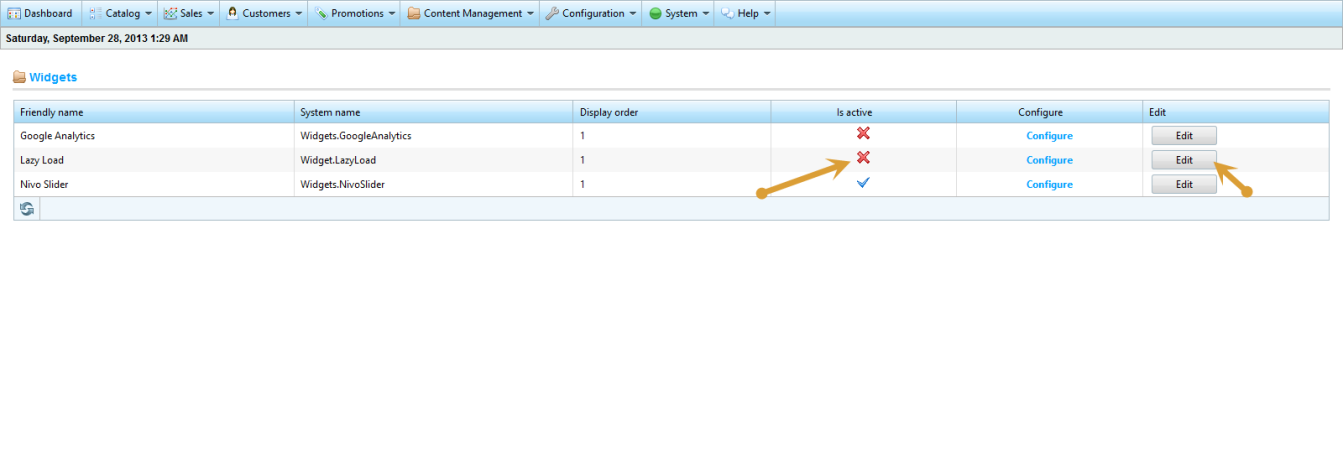
8. You can configure the plugin by clicking on the Configure button.
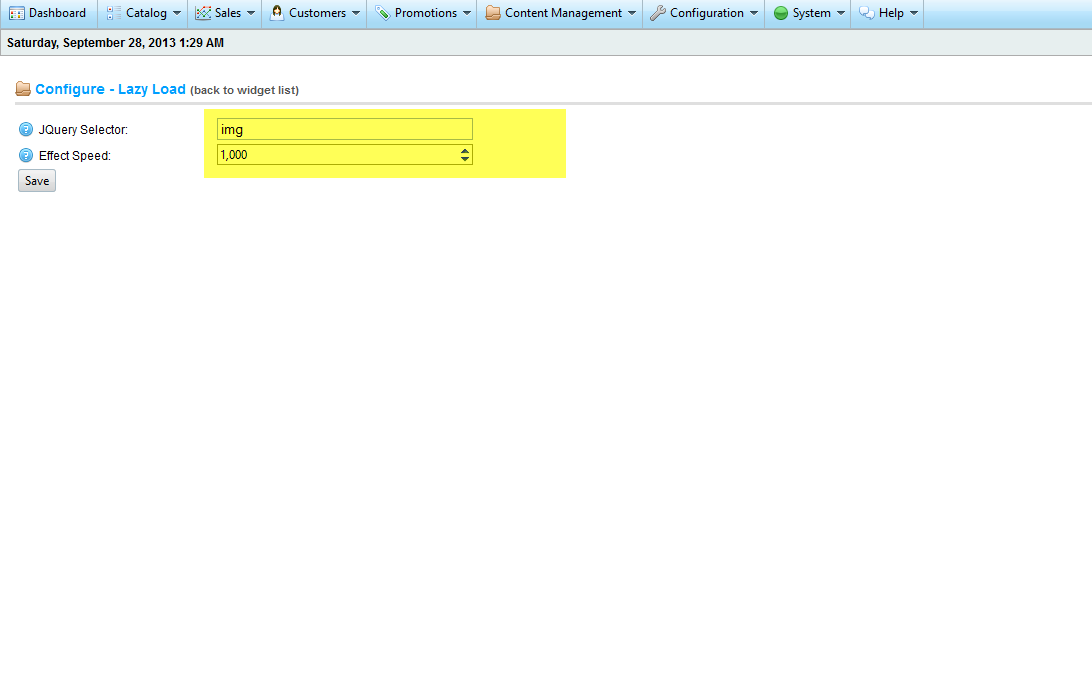
This is the screen you will see. You can select the Jquery selector (e.g img , #header img , #section img ) where the plugin will apply. In this example where the selector is set to img , all images will be “lazy loaded”. You can also set the speed of the effect. This is in milliseconds. So if you set 5000, that means the images will appear gradually as they enter in the viewport with a 5 seconds delay.
Have any questions?
We will be more than happy to hear about your project/idea or just say hello!
Work with Us
